> ## Documentation Index
> Fetch the complete documentation index at: https://docs.qubesync.com/llms.txt
> Use this file to discover all available pages before exploring further.
# Quickstart
> Send your first request to QuickBooks in 5 minutes.
### Preparing your QuBe Sync account
From the [https://qubesync.com](https://qubesync.com) homepage, click "Register" and create your free account
In the Connections tab, create a new connection. Select your development app and click save.
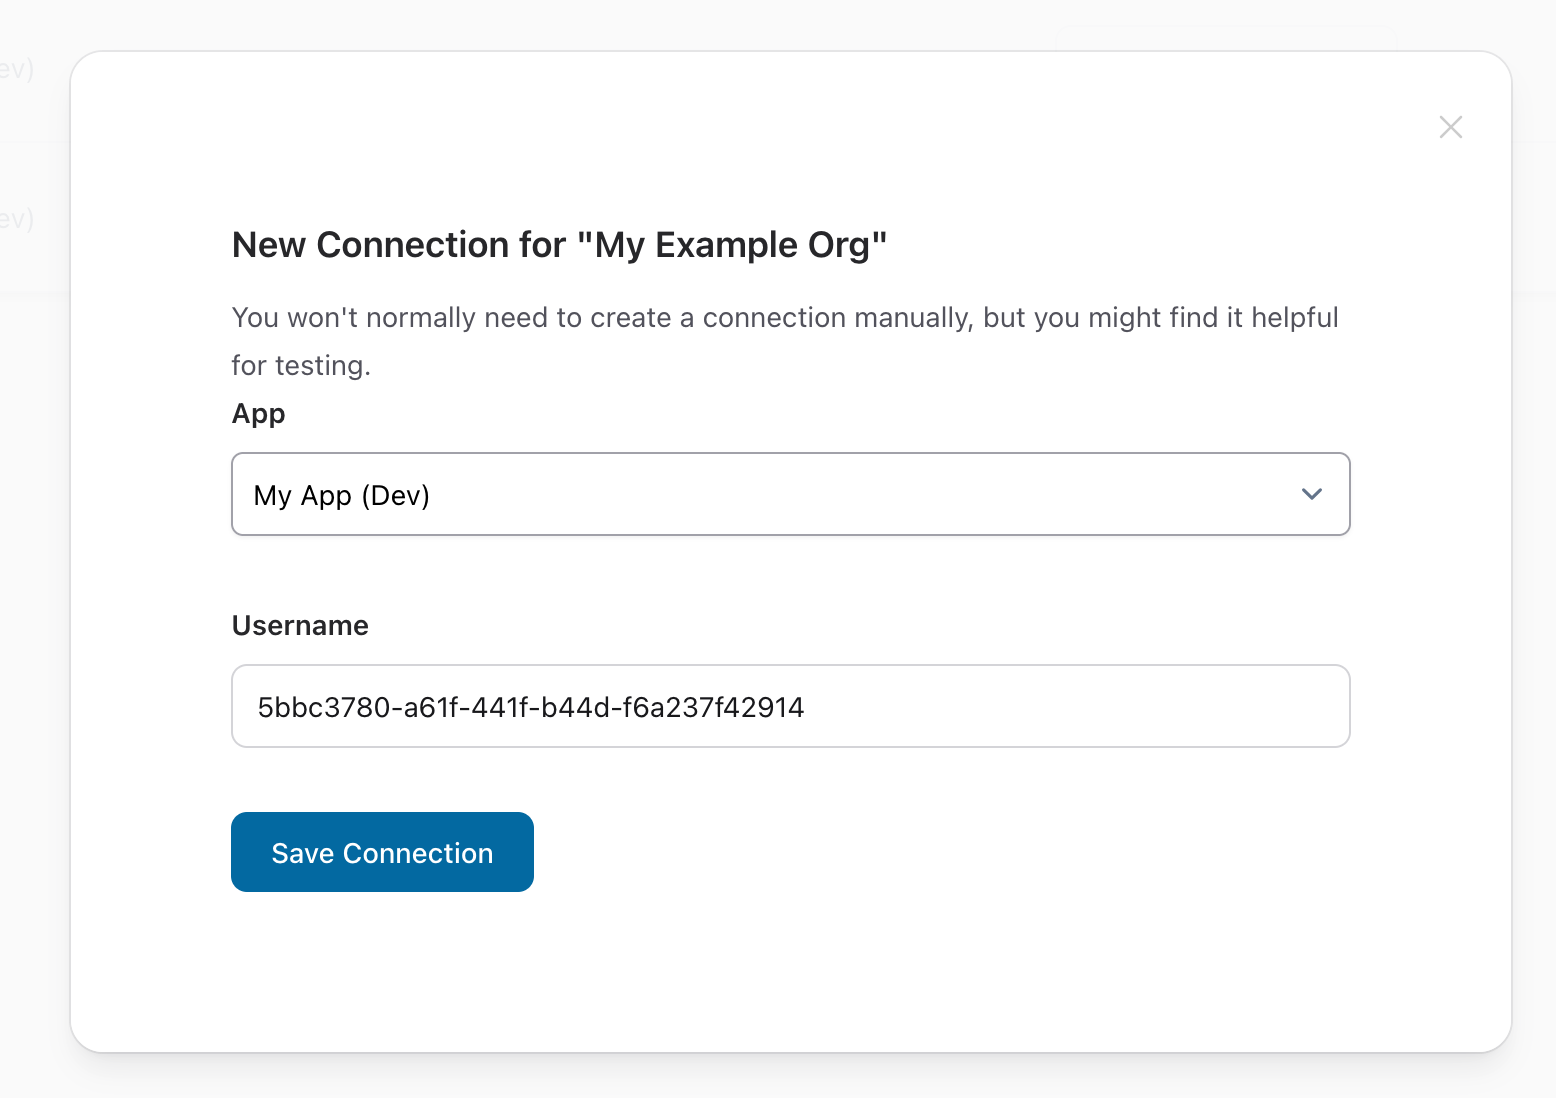 Usually, this will be done programmatically by posting to the connections endpoint:
`post https://qubesync.com/api/v1/connections`
### Set up the QuickBooks Web Connector
The Web Connector should come pre-installed with QuickBooks, and allows QuickBooks to communicate with web applications.
From your new connection, you can get an onboarding url by clicking "Copy Onboarding URL". You'll need to open this URL from the Windows computer or VM where you have QuickBooks installed and follow the simple instructions!
Usually, this will be done programmatically by posting to the connections endpoint:
`post https://qubesync.com/api/v1/connections`
### Set up the QuickBooks Web Connector
The Web Connector should come pre-installed with QuickBooks, and allows QuickBooks to communicate with web applications.
From your new connection, you can get an onboarding url by clicking "Copy Onboarding URL". You'll need to open this URL from the Windows computer or VM where you have QuickBooks installed and follow the simple instructions!
 Check the checkbox next to your app in the Web Connector and click "Update Selected". You should see it authenticate and then finish with "No data exchange required" in green if everything has gone according to plan!
### Make a Test Request
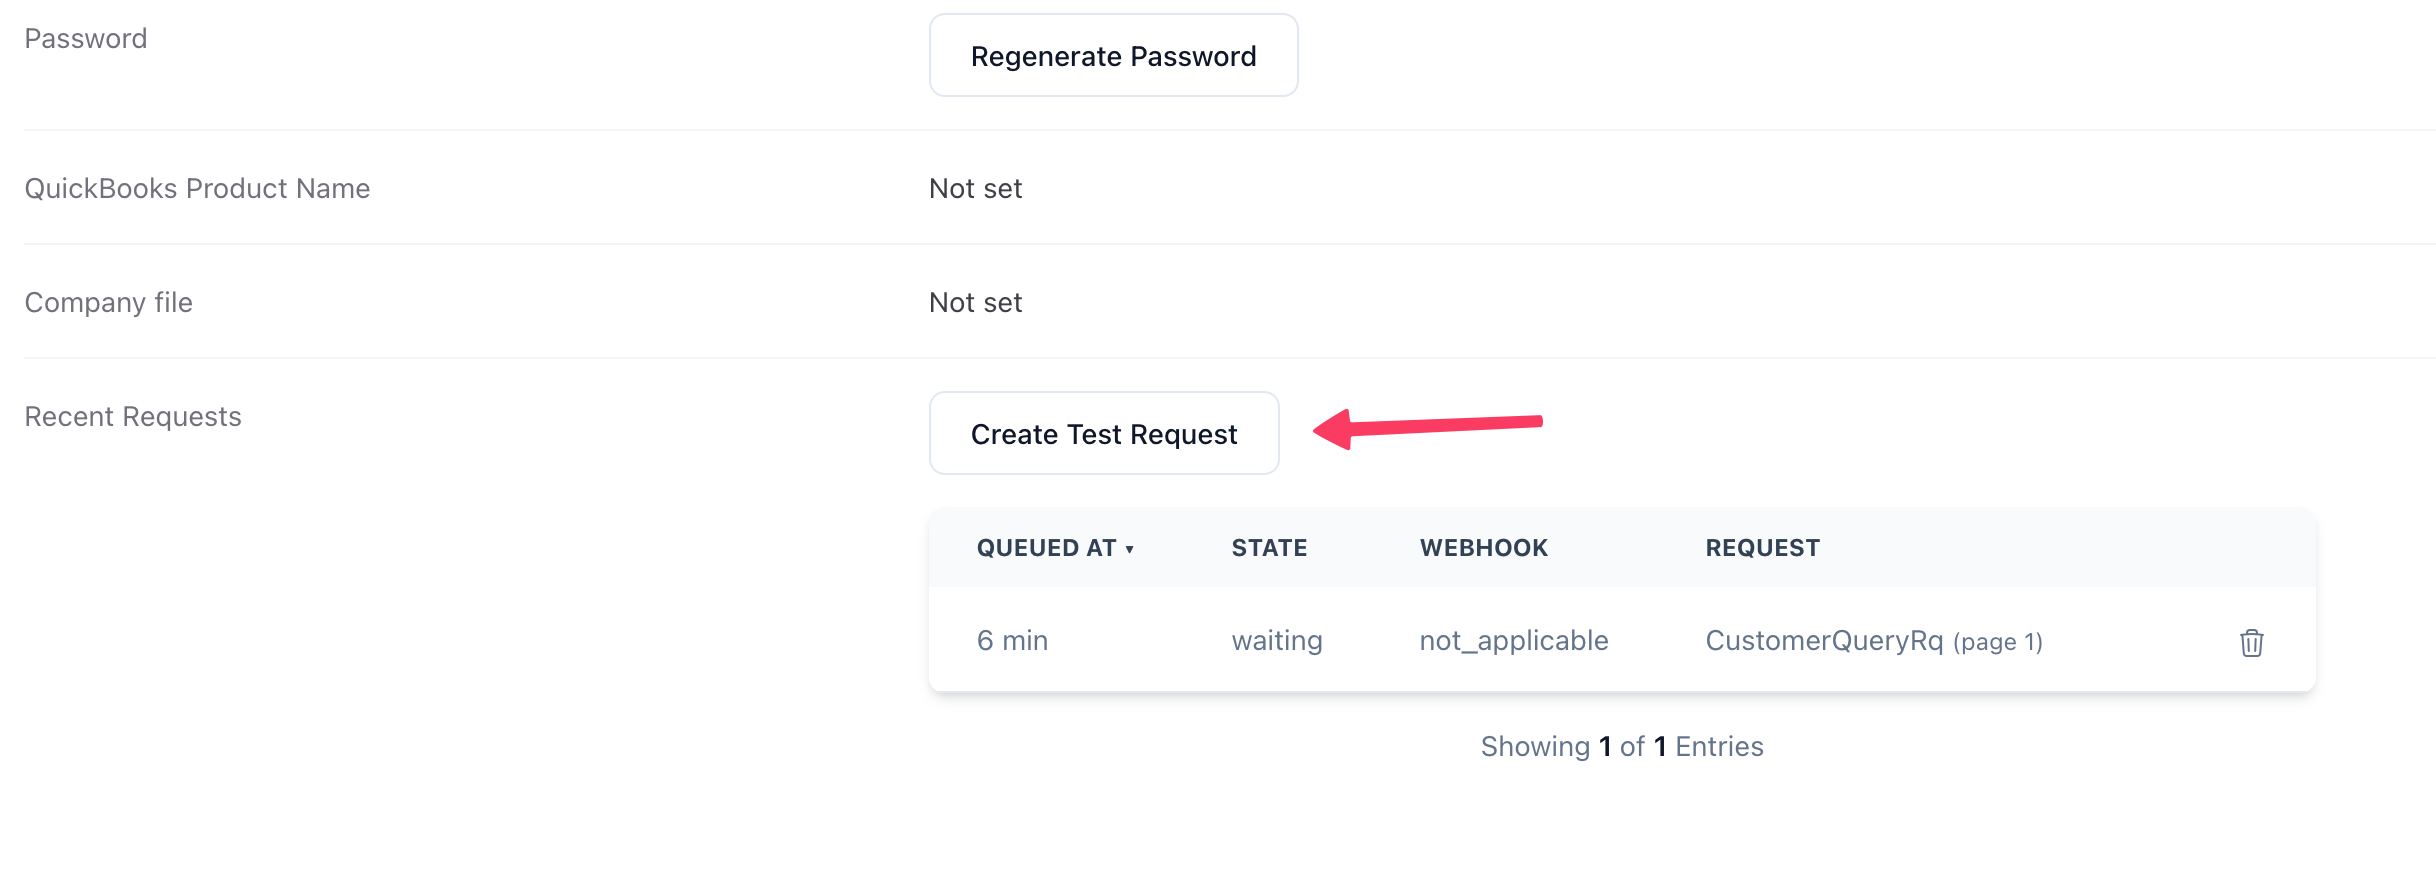
From that same connection screen, you can click "Create Test Request" to fire off a Customer Query - click "Update selected" in your Web Connector to expedite the response and check out the results!
Check the checkbox next to your app in the Web Connector and click "Update Selected". You should see it authenticate and then finish with "No data exchange required" in green if everything has gone according to plan!
### Make a Test Request
From that same connection screen, you can click "Create Test Request" to fire off a Customer Query - click "Update selected" in your Web Connector to expedite the response and check out the results!
 ### ...or make a custom request
In the "My Applications" tab, click into the sandbox app. We've generated an API key for you - click to copy it, and have it ready to use in your environment (e.g. `export QUBE_API_KEY="foo..."` )
QuBe Sync gives you the full power of any QBXML request, but also has some prebuilt endpoints for common use cases. Here we'll ask for a list of customers
```bash cURL theme={null}
export QUBE_API_KEY="..." # get this from My Applications tab
export CONN_ID="..." # get this from the Connections tab
curl https://qubesync.com/api/v1/connections/$CONN_ID/customers?max_returned=10 \
--user $QUBE_API_KEY:
```
```ruby ruby theme={null}
ENV["QUBE_API_KEY"]="..."
require 'net/http'
require 'uri'
require 'json'
connection_id = "..."
connection_url = "https://qubesync.com/api/v1/connections/#{connection_id}"
uri = URI.parse("#{connection_url}/customers?max_returned=10")
request = Net::HTTP::Get.new(uri)
request.basic_auth(ENV["QUBE_API_KEY"], "")
request.content_type = "application/json"
response = Net::HTTP.start(uri.hostname, uri.port, use_ssl: true) do |http|
http.request(request)
end
# Check the response
if response.is_a?(Net::HTTPSuccess)
puts "Request was successful!"
puts "Response body: #{response.body}"
# opening the request's page in the browser.
`open #{JSON.parse(response.body)["data"]["links"]["ui"]}`
else
puts "Request failed with status code: #{response.code}"
puts "Response body: #{response.body}"
end
```
The response has a link to the request in the UI (`data.links.ui` ) to watch the request as it's processed by the web connector. Hit "Update Selected" on the Web Connector and see your customers!
### ...or make a custom request
In the "My Applications" tab, click into the sandbox app. We've generated an API key for you - click to copy it, and have it ready to use in your environment (e.g. `export QUBE_API_KEY="foo..."` )
QuBe Sync gives you the full power of any QBXML request, but also has some prebuilt endpoints for common use cases. Here we'll ask for a list of customers
```bash cURL theme={null}
export QUBE_API_KEY="..." # get this from My Applications tab
export CONN_ID="..." # get this from the Connections tab
curl https://qubesync.com/api/v1/connections/$CONN_ID/customers?max_returned=10 \
--user $QUBE_API_KEY:
```
```ruby ruby theme={null}
ENV["QUBE_API_KEY"]="..."
require 'net/http'
require 'uri'
require 'json'
connection_id = "..."
connection_url = "https://qubesync.com/api/v1/connections/#{connection_id}"
uri = URI.parse("#{connection_url}/customers?max_returned=10")
request = Net::HTTP::Get.new(uri)
request.basic_auth(ENV["QUBE_API_KEY"], "")
request.content_type = "application/json"
response = Net::HTTP.start(uri.hostname, uri.port, use_ssl: true) do |http|
http.request(request)
end
# Check the response
if response.is_a?(Net::HTTPSuccess)
puts "Request was successful!"
puts "Response body: #{response.body}"
# opening the request's page in the browser.
`open #{JSON.parse(response.body)["data"]["links"]["ui"]}`
else
puts "Request failed with status code: #{response.code}"
puts "Response body: #{response.body}"
end
```
The response has a link to the request in the UI (`data.links.ui` ) to watch the request as it's processed by the web connector. Hit "Update Selected" on the Web Connector and see your customers!